Written by the Tattoo Numbing Cream Co. team — trusted by 600,000+ customers and used in professional studios worldwide. We've spoken to hundreds of artists and clients building patchwork sleeves across Australia, the US, and UK. The advice here comes from those conversations. This guide covers everything you need to know about tattoo pain.
Patchwork sleeves are having their moment.
Scroll through TikTok or Instagram and you'll see them everywhere — the deliberately unconnected collection of individual pieces, each with its own framing, gaps of skin between them. It looks effortless. Like a living scrapbook on someone's arm.
Building one is a genuinely interesting challenge when it comes to pain management. Because a patchwork sleeve isn't a single appointment. It's a project — months or years of individual sessions, building a cohesive sleeve one piece at a time.
Here's everything you need to know.
The Complete Guide to Patchwork Sleeve Tattoos: Pain, Prep & Numbing (2026)
What Is a Patchwork Sleeve?
A traditional sleeve fills the arm with connected imagery and background — continuous, cohesive, from shoulder to wrist. Patchwork is the opposite philosophy.
Individual pieces — each with their own style, framing, and meaning — sit on the arm with visible skin (negative space) between them. You add more over time. You might never call it "finished." That's often the point.
Common styles in patchwork:
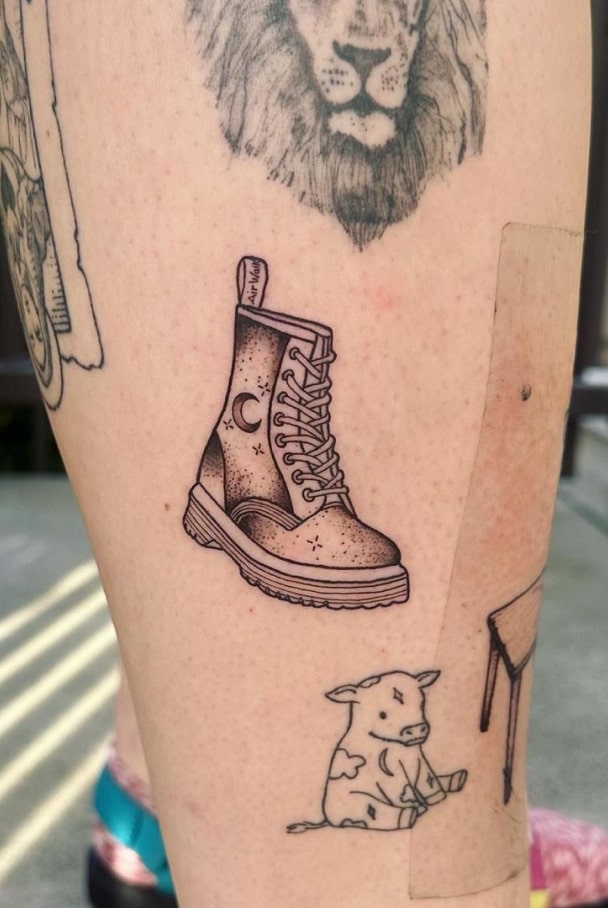
- Traditional American — bold outlines, solid fills, iconic imagery
- Blackwork / neo-traditional — strong graphic elements, heavy black
- Fine line — delicate, minimal pieces scattered between bolder work
- Flash art — small traditional pieces collected over time from different artists
- Mixed style — deliberately varied, which is part of the aesthetic
The trend in 2026: patchwork removed the commitment barrier. You don't need to know at 22 what you want on your whole arm forever. You build as you go. Pieces mark different life stages, interests, relationships. The incompleteness is intentional — and increasingly, it's the aesthetic.
The Pain Reality
Here's what nobody tells you about patchwork sleeves and pain: they're both easier and harder than a traditional sleeve, and it depends entirely on the session.
Why Each Session Can Surprise You
Each patchwork session focuses on one piece in one area. Sessions are shorter — that's the advantage. But it's also variable, because arm placement pain differs enormously by zone.
High-pain zones on the arm:
- Inner elbow (elbow ditch) — extremely sensitive, thin skin over veins and nerves
- Inner wrist — thin skin, tendons and veins close to the surface
- Inner upper arm (bicep facing) — sensitive, often poorly padded
Lower-pain zones:
- Outer upper arm — thicker skin, lower nerve density
- Outer forearm — most people find this manageable and consistent
- Outer elbow — counterintuitively less painful than its inner counterpart
As you build your sleeve, you can't stay on the easy real estate forever. Your first few sessions might land in comfortable zones. Eventually you'll need pieces on the inner arm, the ditch, the wrist. Plan for it.
The Cumulative Effect
Something patchwork does differently to traditional sleeves: the accumulated sensitivity of returning to a healing arm. When you add a new piece near healed work, the healed tattoos don't hurt. But the fresh area does. And if pieces are close together, sometimes a new session irritates zones that are still sub-clinically healing.
Proper spacing (more on that below) keeps this manageable. But it's worth knowing your arm's baseline sensitivity shifts as the collection grows.
How Many Sessions Does It Take?
No definitive answer, because patchwork sleeves are never truly done unless you decide they are. But here's a rough framework:
A half sleeve (shoulder to elbow) with small pieces (1–3 hours each) might involve 8–15 individual pieces. At one session per 4–6 weeks, that's 1–3 years of building. A few larger anchor pieces change the math considerably.
Most people with impressive patchwork sleeves have been building for 2–5 years. That's a feature, not a problem. The sleeve evolves with you.
Session Planning: How to Build Effectively
Spacing Between Sessions
Surface healing — the peeling and flaking phase — takes 2–3 weeks. For most people, 4–6 weeks minimum between sessions on the same arm is the right interval.
Why: the skin needs to settle before a needle goes near it again. Your artist needs to see the healed result to plan the next piece's placement. And your immune system needs a break from sustained healing work.
Both arms simultaneously? Yes — completely different locations, healing independently. Some people build both arms at once to compress the overall timeline.
Managing Negative Space
The skin between pieces is part of the design. Your artist needs to think about:
- Framing — how each piece sits cleanly in isolation
- Future real estate — leaving room for additions without creating awkward gaps
- Eventual fill decisions — some patchwork sleeves eventually get a light background fill to unify everything. Plan for this possibility from the start, even if you don't commit to it.
Work with an artist who has done patchwork sleeves before. Planning a patchwork sleeve is a different skill set to planning a traditional sleeve — both technically and visually.
The Artist Relationship
Patchwork works best when you have a consistent artist for most pieces — or at minimum, one who understands what you're building and helps you curate it. Mix-and-match from multiple artists can work (some people collect deliberately from different tattooers), but you need a vision holder. Book a consultation early. Map zones. You don't need to commit to every design — just to the general geography.
Practical tip most guides skip: Take a photo of your arm at each session — same angle, same lighting. Building a patchwork sleeve over years makes it hard to see the progress. Side-by-side photos from session 1 and session 10 are genuinely motivating, and they help your artist visualise where to place the next piece without having to reconstruct the whole plan from scratch.
Numbing Cream for Patchwork: Why It Matters More Here
Numbing cream matters more for patchwork than for almost any other tattoo project. Four reasons:
1. You're Doing This Dozens of Times
A full patchwork sleeve involves 10–20+ separate sessions across years. Every session is a pain experience that will either motivate you to keep booking or discourage you from continuing. If sessions on the hard areas are consistently brutal, the sleeve stalls. Permanently.
Numbing cream keeps the barrier low. Sessions that would otherwise be difficult become manageable. You keep going. The sleeve keeps growing.
2. Hard Areas Become Achievable
The inner elbow and inner wrist are where patchwork sleeves often stall. People happily collect outer arm pieces for years but keep avoiding the inner arm. With proper numbing preparation, these areas are still uncomfortable — but they're workable. You expand the canvas.
3. Most Sessions Are Short Enough for One Application
Unlike a full-day traditional sleeve session, most individual patchwork sessions run 1–3 hours. A single proper cream application covers that window.
Protocol for 1–3 hour sessions:
- Apply Signature Tattoo Numbing Cream Numbing Cream to the target area 60–90 minutes before your session
- Cover with cling film (occlusive wrap) — this is essential, not optional
- Remove, wipe clean, proceed with tattooing
- Effective numbing typically lasts 1.5–2.5 hours from first needle contact
- For sessions running longer, Miracle Numb Spray on broken skin extends the window
For sessions covering two areas: Apply cream to the first area on arrival. Apply cream to the second area at the start of the session, so it's active by the time the artist moves over.
See: full multi-zone protocol for sleeve sessions
4. The Artist Conversation
For patchwork — where you're building a long relationship with your artist across many sessions — it's worth having the numbing conversation upfront.
The main concern artists raise is the skin feeling different under the needle with certain high-strength multi-active formulas. A professional-grade single-active formula minimises this effect significantly. When talking to your artist, mention you're using a single-active professional formula — not a high-strength product with multiple agents. Most artists' concerns drop when they understand the distinction.
See: Does Numbing Cream Make Skin Spongy? What Artists Actually Say
Pain Scale by Arm Zone
| Zone | Pain Level | Notes |
|---|---|---|
| Outer upper arm (shoulder area) | 3–4/10 | Most people start here. Easiest zone. |
| Outer forearm | 4/10 | Consistent, manageable. Popular patchwork territory. |
| Inner forearm | 5–6/10 | More sensitive. Softer skin. |
| Inner upper arm | 6–7/10 | Noticeably harder. Can't avoid it for full coverage. |
| Outer elbow | 5/10 | Bony but less painful than its reputation. |
| Inner elbow (elbow ditch) | 8–9/10 | Where patchwork sleeves get difficult. High nerve density. Numbing cream makes a material difference here. |
| Outer wrist | 5–6/10 | Manageable, though bony. |
| Inner wrist | 6–7/10 | More sensitive. |
Recommendation: Plan your hardest pieces for when you're most invested in the project — not first. Build momentum on easy zones, then tackle the ditch and inner arm once you're committed.
Aftercare for Multi-Session Builds
Patchwork aftercare follows the same protocol as any tattoo. A few things to know specific to building a sleeve:
Proximity to healed work is fine. A fresh session near healed tattoos won't damage the healed pieces. The healed area may show temporary redness from nearby inflammation — normal, settles within days.
Watch for faster fading on high-movement zones. Inner wrist and outer forearm pieces move a lot. They may need touch-ups sooner than pieces on more stable skin.
SPF matters more with a growing sleeve. Once fully healed (6+ weeks), protect your pieces from UV. Sun fades ink faster than almost anything else. Tattoo Armour SPF 30 is formulated for tattooed skin — regular sunscreens work but aren't optimised for the specific needs of tattooed areas.
If your patchwork includes fine line pieces: fine line aftercare is different and worth understanding.
Frequently Asked Questions
How do I start a patchwork sleeve?
Start with an idea, not a plan. Know you want a patchwork sleeve, book a consultation with an artist who has patchwork in their portfolio, and talk through general placement zones. Most artists suggest 1–2 anchor pieces in prominent positions first, then building around them. You don't need to know every design upfront.
Can you mix tattoo styles in a patchwork sleeve?
Yes — the variety of styles is part of the aesthetic. Traditional American, blackwork, fine line, and neo-traditional pieces can live on the same arm. Sticking to a limited colour palette (all black and grey, or predominantly black with selective colour) helps cohesion even when styles vary.
Does patchwork hurt more than a traditional sleeve?
Each individual session is shorter and generally more manageable than a full-day traditional sleeve. But patchwork involves more total sessions and eventually covers all the same painful zones. Total pain across the project's lifetime is similar — just distributed over more appointments.
How much does a patchwork sleeve cost?
Each piece is priced individually. Small pieces at typical studio rates ($150–$300/hour) run $150–$600 per session. A full patchwork sleeve with 15–20 pieces could cost $3,000–$8,000+ across the project's lifetime. The cost is spread across months or years of sessions.
Can I use numbing cream for every session?
Yes. There's no reason not to use numbing cream for every session, particularly for inner arm and elbow ditch pieces. A professional-grade single-active formula is safe for regular use. Apply 60–90 minutes before each session with occlusive wrap.
Ready to Start Building?
Patchwork is a long game. That's the beauty of it. It evolves with you, marks where you've been, leaves room for where you're going.
The biggest barrier to building a great sleeve isn't design — it's stalling out after a few hard sessions. Remove that barrier from the start.
→ Signature Tattoo Numbing Cream Numbing Cream — pre-session prep
→ Miracle Numb Spray — mid-session on broken skin
→ Signature Duo Bundle — cream + spray together, best value for multi-session projects